Unable to connect to WiFi on your Windows 11? The initial version of Windows 11 that was rolled out to the public did have some bugs, and Microsoft did a good job resolving those. However, one might encounter some bugs and issues on Windows 11, such as no WiFi Networks found.
Many users who switched to Windows 11 recently reported this issue, which is most probably due to bugs in the system. If you encounter this issue and are looking for a fix, this article will help you. This article will discuss how you can fix the lack of WiFi Networks found in Windows 11 computers.
Ways to Fix No WiFi Networks Found in Windows 11
If your PC is unable to find WiFi networks, then follow the steps given below to fix the issue-
1. Restart the WiFi
If your PC cannot find WiFi networks, restart your WiFi. Turn off the WiFi, wait for some time, and then turn it on again. Once done, check if the issue is solved. If it is not, move to the next step in this article.
2. Run Network Troubleshooter
You should run the network troubleshooter if you are facing any WiFi issues. It will analyze any issue with the WiFi and fix it. To run the network troubleshooter, follow the steps given below –
- Open the Settings app on your PC. You can do this by pressing Windows + I key combo.
- Here, under the System tab, click on Troubleshoot option.
- Now, click on Other Troubleshooters.
- Click on the Run button next to the Internet Connections and follow the on-screen instructions to run the network troubleshooter.


3. Update WiFi Drivers
Another reason behind this issue is outdated WiFi drivers. You must update your drivers to ensure the best performance from your hardware. If you have any pending updates for WiFi drivers, that may be causing this issue. Update your drivers by following the steps given below to fix this issue-
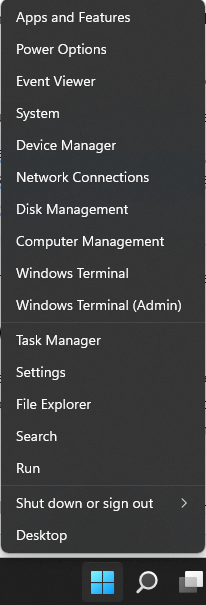
- Press Windows + X key combo and then click on Device Manager on the menu.
![start menu device manager]()
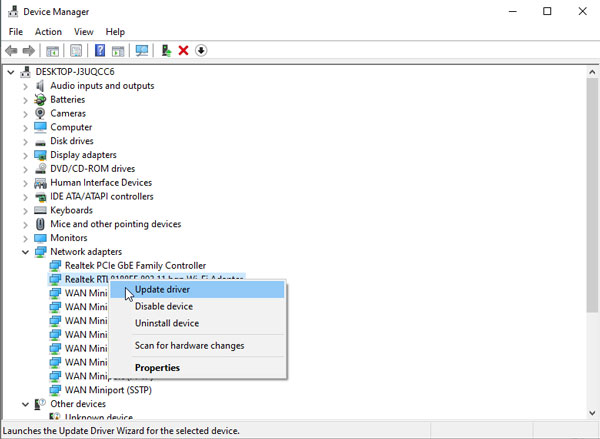
- Here, double-click on Network Adapters to expand it.
- Right-click on your WiFi adapter from the list of devices and then on Update Driver.
![]()
- Now, click on Search Automatically for Drivers to download and install drivers from the internet.
- Once the driver update has been installed, restart your PC.
4. Reinstall WiFi Driver
If updating the WiFi driver didn’t help, then reinstall the WiFi driver. To do so, follow the steps given below-
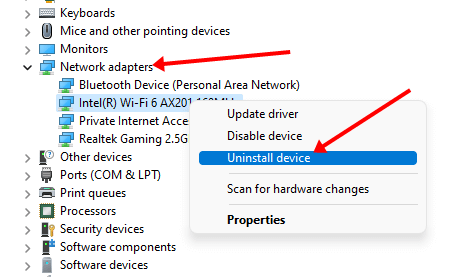
- Firstly, open Device Manager on your PC.
- Expand the Network Adapters option by double-clicking on it.
- Right-click on your WiFi adapter and click on Uninstall Device. Confirm uninstalling by clicking on Uninstall again.
![Uninstall Device wifi]()
- Once the driver has been successfully uninstalled, restart your PC.
- After doing so, the WiFi driver will be reinstalled on your system and you should no longer face issues.
5. Update Windows
If the issue occurs due to a bug in the system, then updating the system will fix the problem. To do so, follow the steps given below-
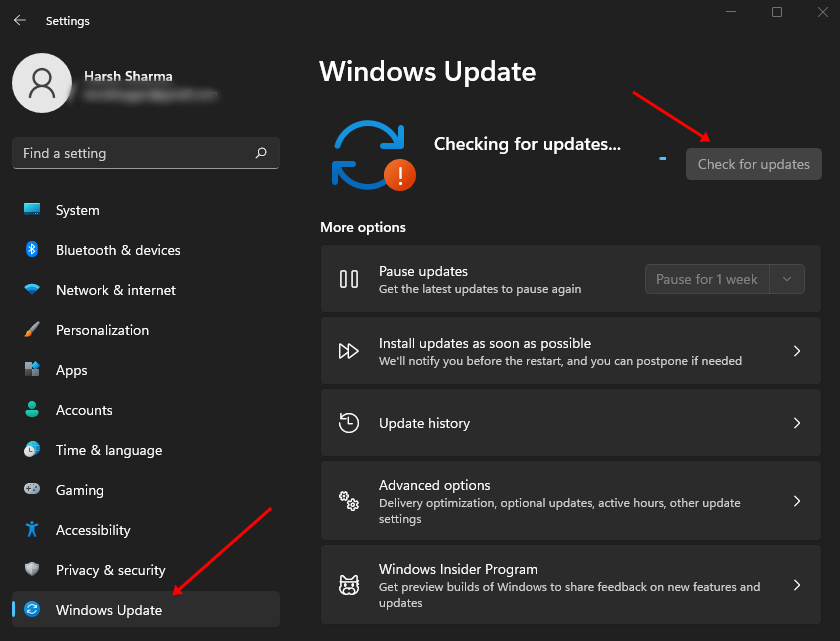
- Press Windows + I key combo to open Settings.
- Here on the left sidebar, click on the Windows Update tab.
- Now, click on the Check for Updates button to scan for updates.
![check for updates]()
- If any updates are available, download and install them.
- After installing the updates, restart your PC.
6. Change WiFi Channel Value
Another troubleshooting step to follow is changing the WiFi Channel Value to auto. Many users have said that following this method helped fix the issue for them. To do so, follow the steps given below –
- Press Windows + I keys to open Windows 11 Settings.
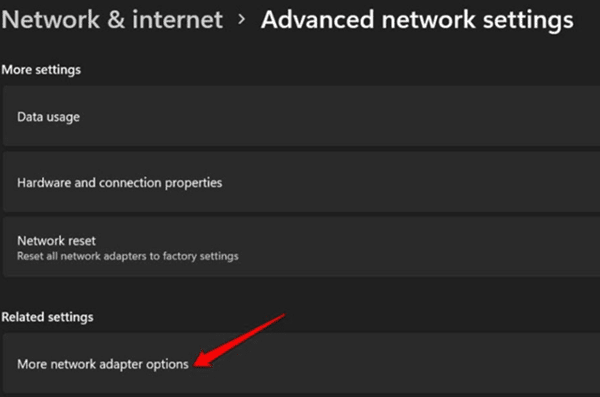
- Under the Network & Internet tab, click on Advanced Network Settings and then on More network adapter options.
![more network adapter options (1)]()
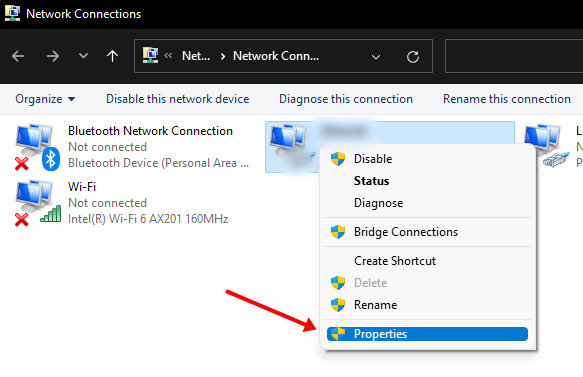
- Right-click on your network adapter and click on Properties.
![click on Properties]()
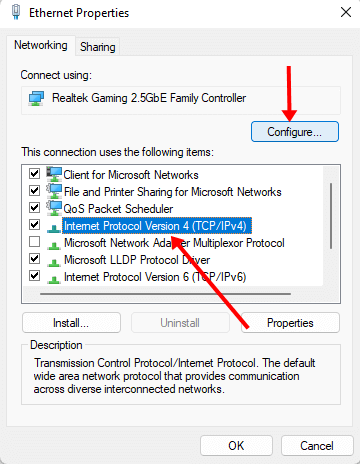
- Now, select Internet Protocol Version 4 and then click on Configure.
![Internet Protocol Version 4]()
- Under the Advanced tab, click 802.11 (WiFi Channel Value).
- Click on the drop-down menu under Value and select Auto.
- Once done, click on OK to save the changes.
7. Reset Network Settings
Lastly, reset your network settings if you still encounter the “no WiFi network found” issue in Windows 11. The issue may occur due to incorrect network settings.
Network settings will be reverted to default upon resetting them, which will most probably fix the issue you have been facing. To do so, follow the steps given below-
- Press the Windows key, and then click on the Settings icon.
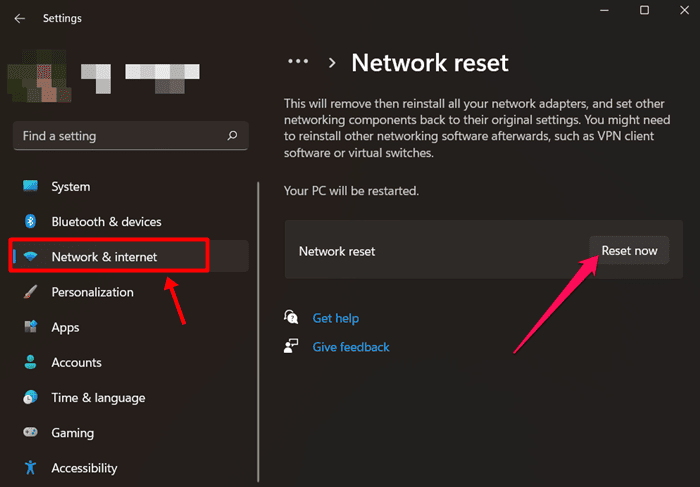
- On the left sidebar, click on Network & internet option.
- Now, click on Advanced Network Settings and then on Network Reset.
- Click on the Reset Now button to reset the network settings.
![Network Reset]()
- You will have to restart your PC to save the changes you made.
Conclusion
If your PC cannot detect Wi-Fi networks, this article will help you. This article shows the steps to help fix no Wi-Fi networks found in Windows 11. However, if you are still facing the issue, you can connect your router to your PC with the cable if your PC has an ethernet port.
The post 7 Ways to Fix No WiFi Networks Found in Windows 11 appeared first on TechDator.