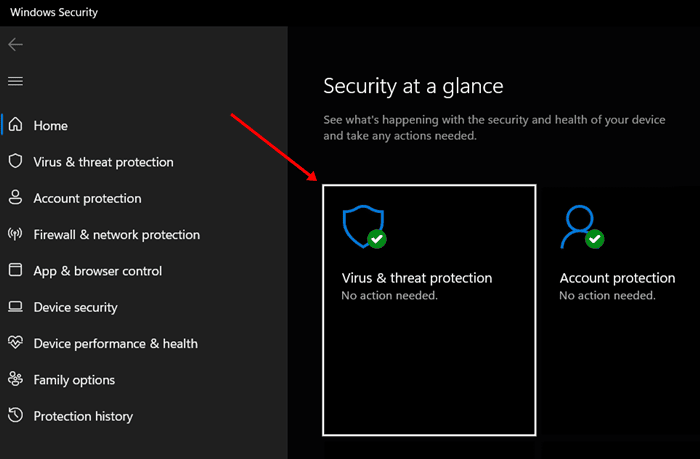
Windows users often rely on Windows Security rather than a third-party antivirus to protect from viruses. Though Windows Security works fine when detecting viruses and fixing the issues they have caused, it becomes problematic when Windows virus and threat protection suddenly stops working.
Many users have encountered a similar issue. They have reported that Virus and Threat Protection is not working on Windows 11; it does not scan for viruses when clicking on the scan button or when an external storage device is connected to the PC.
Windows Security is the first line of security for Windows PC. When it stops working, your PC will no longer stay protected from cyber threats, especially if you don’t have a third-party antivirus.
But what causes this issue, and what should I do to fix it? Worry not—we have answers to all your questions. Read ahead to learn more.
Fix Virus and Threat Protection Not Working in Windows 11
How do I fix this virus and threat protection issue on my PC? It is easy to fix this issue, but before we go on with the fix, it is crucial to know what causes this issue. You may encounter this issue due to the following reasons-
- Third-party antivirus interfering with the Windows Security.
- Pending Windows Updates can also cause this issue.
- You may face this issue due to corrupted system files.
- The issue can also be encountered within the Windows Security.
There can be multiple reasons that may cause this issue. You can follow the steps we have mentioned below to fix Virus and Threat Protection not working in Windows 11–
1. Restart PC
The first step to fixing this issue is restarting the system. As we talked about earlier, one of the most prominent causes of this issue is bugs and glitches in Windows Security.
A system restart restarts all the apps and services in the background along with Windows Security, thus clearing all the bugs and glitches. You can restart your PC to fix the issue that you have encountered with Windows Security.Image may be NSFW.
Clik here to view.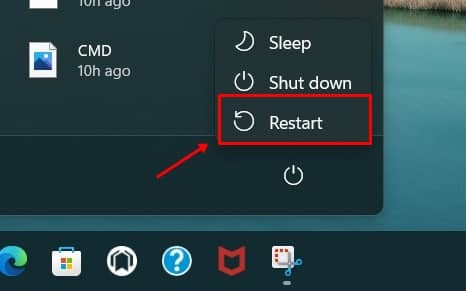
2. Disable Third-Party Antivirus
Third-party antivirus and antimalware can interrupt the Windows Security processes running in the background and cause this issue. If you have third-party antivirus software like Avast, Kaspersky, Norton, Quick Heal, etc., temporarily disable them.
If the issue is still encountered, then the reason behind this issue is something else and not the third-party antivirus. If you do not encounter the issue, then you can uninstall the third-party antivirus software if you want to use Windows Security to protect your Windows PC.Image may be NSFW.
Clik here to view.
3. Fix Corrupted System Files
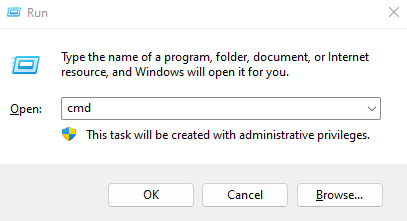
One of the most common reasons for facing this issue is the corrupted system files. If the system or Windows Security files are corrupted, then the virus and threat protection won’t work. You can repair the corrupted or deleted system files by running the SFC scan. To do so, follow the steps given below-
- Press the Windows + R keys together, type cmd, and then press Ctrl + Shift + Esc. Image may be NSFW.
Clik here to view.
- On the UAC prompt, click Yes to run Command Prompt with administrative privileges.
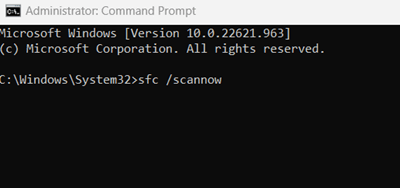
- Next, execute the command given below to run the SFC scan-
- sfc /scannowImage may be NSFW.
Clik here to view.
- sfc /scannowImage may be NSFW.
- Wait for the process to complete, close the Command Prompt, and reboot your PC.
4. Install Windows Update
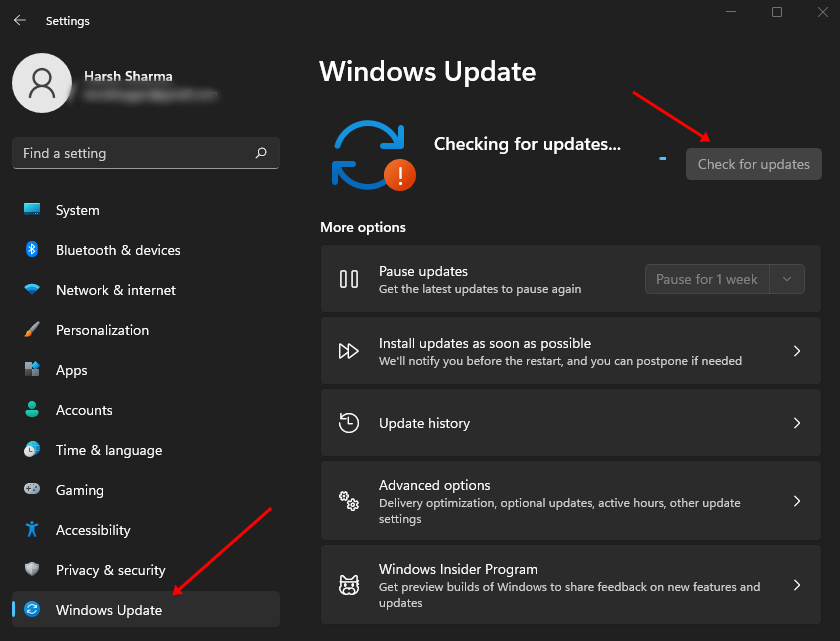
This issue can also be caused by outdated or pending Windows updates. Check for the latest Windows updates and install them to fix this issue. Installing the Windows update will fix the issue and update the Windows Security. Below are the steps to do so-
- From the Start Menu, open the Windows 11 Settings.
- Click on the Windows Update on the left pane.
- You will see the Check for Updates button; click on it. Image may be NSFW.
Clik here to view. - Click on Download & Install button next to all the updates to install them.
- A restart will be required to implement the changes that the Windows Update brings.
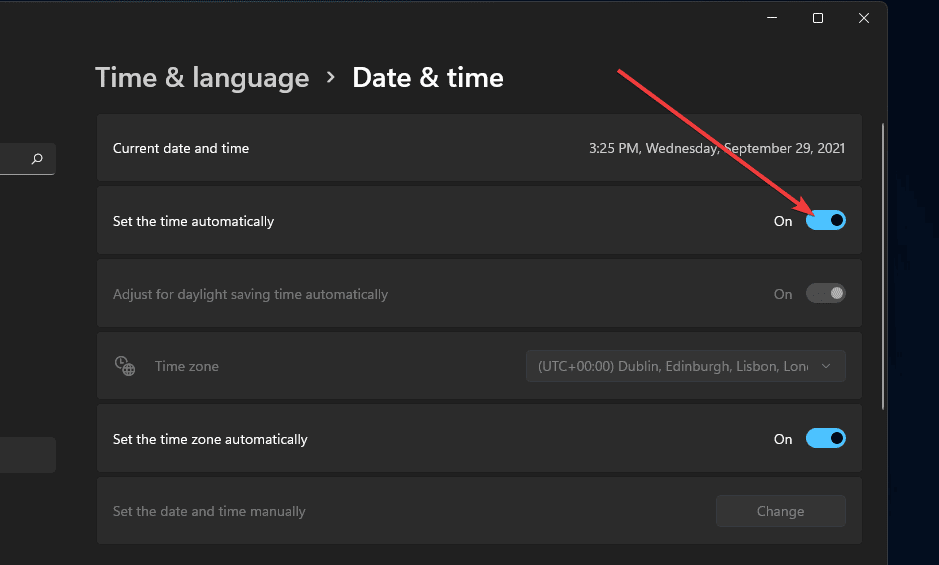
5. Set the Correct Date and Time
This issue is often reported by users who have set the incorrect date and time on their PCs. To fix this issue, ensure the date and time on your PC are correct.
- Open the Settings app on your PC.
- Click on Time & Language on the left pane.
- Next, click on Date & Time on the right side.
- Now, turn on the Set Time Automatically toggle. This will automatically set the correct date and time. Image may be NSFW.
Clik here to view.![Set the time automatically]()
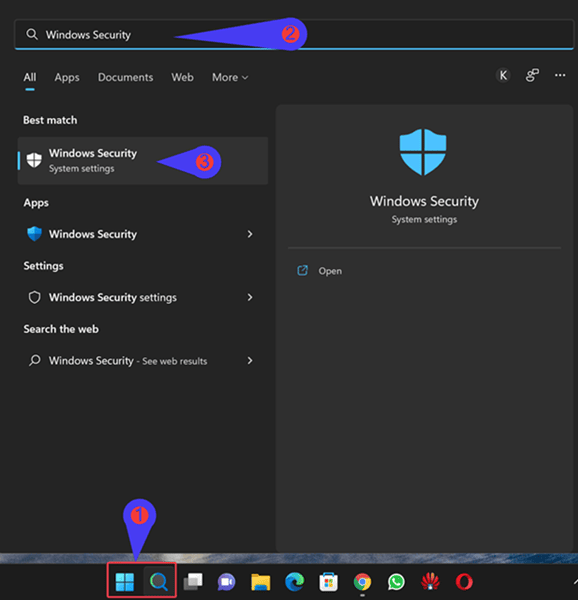
6. Manually Enable Real-Time Protection
If the virus and threat protection keeps going off by itself, causing it not to scan for the virus, then you should try manually enabling it. You can follow the steps given below to fix this issue-
- Open the Start Menu, type Windows Security and press Enter to open it. Image may be NSFW.
Clik here to view.![Windows Security]()
- Click the Virus & Threat Protection option. Image may be NSFW.
Clik here to view.![Windows Security]()
- Under the Virus & Threat Protection Settings, click the Manage Settings option. Image may be NSFW.
Clik here to view.![Manage Settings]()
- Turn on the toggle under Real-Time Protection. Image may be NSFW.
Clik here to view.![Turn on the toggle under Real-Time Protection]()


7. Repair/Reset Windows Security
Another thing that you can try doing is repairing or resetting the Windows Security app. This can be done from within the Settings app. The steps given below will guide you on how you can do so-
- Press the Windows + I keys together to open the Settings app.
- Go to Apps > Apps & Features.Image may be NSFW.
Clik here to view.![Apps & features]()
- Search for Windows Security from the list of apps. Click on the three dots next to it and then on Advanced Options. Image may be NSFW.
Clik here to view.![Advanced Options]()
- Scroll down to the Reset section. Click on the Repair button to repair the app. Image may be NSFW.
Clik here to view.![Click on the Repair button]()
- See if the issue is fixed. If it persists, follow the above steps and click on the Reset button instead of Repair.


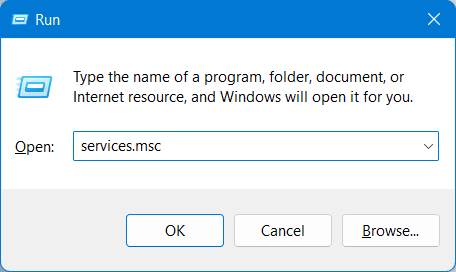
8. Restart Security Center Service
This issue can also be encountered due to the Security Center service when it fails to run as expected. You can try restarting the Security Center service to solve this issue.
- Press Windows + R keys, type Services.msc and click on OK to open it. Image may be NSFW.
Clik here to view.![services.msc]()
- Look for the Security Center service. Right-click on this service, and then click on Restart. Image may be NSFW.
Clik here to view.![Restart Security Center Service]()

Bottom Lines
These are all the steps you can follow to fix virus and threat protection not working in Windows 11. If you have no other security software apart from Windows Security (which comes pre-installed on Windows), then it is crucial to ensure it works flawlessly.
If you are facing issues with the Windows Security software that fails to scan for viruses, you can follow the above steps to fix it.
The post FIX – Virus and Threat Protection Not Working Windows 11 appeared first on TechDator.